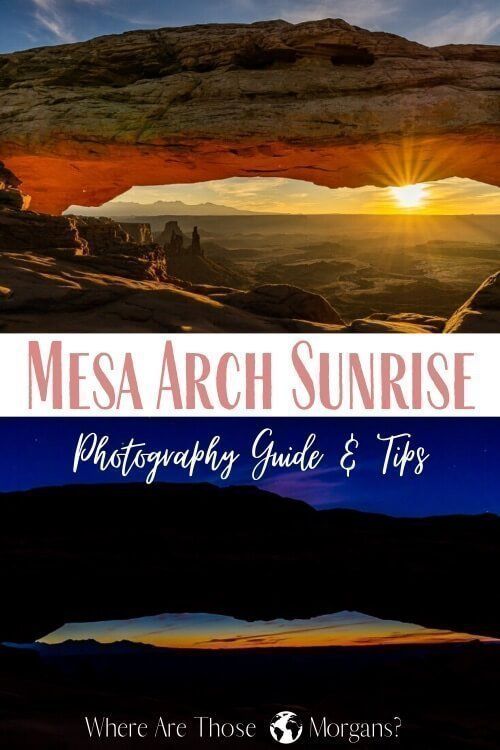
Have you ever heard of the battle royale taking place each morning at sunrise, in the moments leading up to an electrifying scarlet glow illuminating Canyonlands National Park’s Mesa Arch?
Utah’s Mighty 5 national parks road trip is legendary among adventure seekers and travelers in search of the best US road trips. Extraordinary landscapes and staggering scenery are the bread and butter of Utah parks.
Canyonlands – close to Moab in Southeastern Utah – is less popular than its sisters Arches, Zion and Bryce Canyon. But Canyonlands has a hidden treasure up its sleeve: Mesa Arch.
The Problem – Mesa Arch may well be unknown to the average visitor to Utah, but you can bet your life every pro photographer and serious hobbyist in town knows about it.
The Solution – Get your butt out of bed excruciatingly early and be on site ready to roll with finger on shutter before anyone else arrives. It’s as simple as that.
Worst case scenario?
You don’t plan effectively and arrive late, consequently not having a clear view of the mesmerizing scenery as the drama unfolds.
This Mesa Arch Sunrise photography guide will ensure you beat the crowd so you don’t have to jostle for position.
What Is Mesa Arch In Canyonlands National Park?
Arched rock formations can be classified by category. Free-Standing Arches – such as Delicate Arch and Landscape Arch – and Natural Bridge Arches are two of the more famous categories of Arch.
Similar to some of the less famous Arched rock formations at nearby Arches National Park, Mesa Arch is a Pothole Arch formed by weathering over many years.
To reach Mesa Arch you must hike a short and easy trail, which we have included in our guide to the 25 best hikes in Utah.
What Is A Pothole Arch?
Take Mesa Arch but fill in the hole and imagine a slight depression where photographers now contest each morning.
This depression filled with water over many years, which increased its vulnerability to severe weathering and resulted in greater rock depression. Eventually this relentless cycle breached the center of the rock mass and created a pothole.
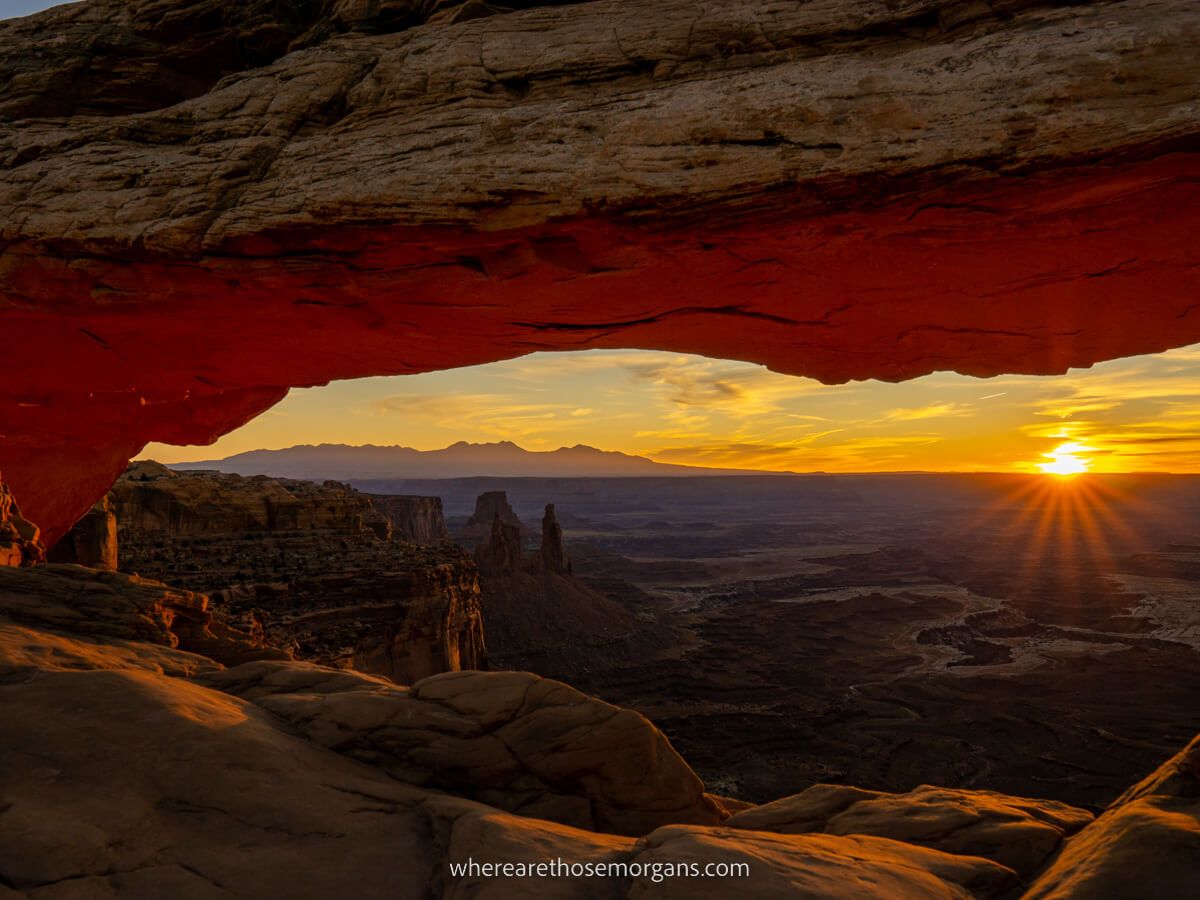
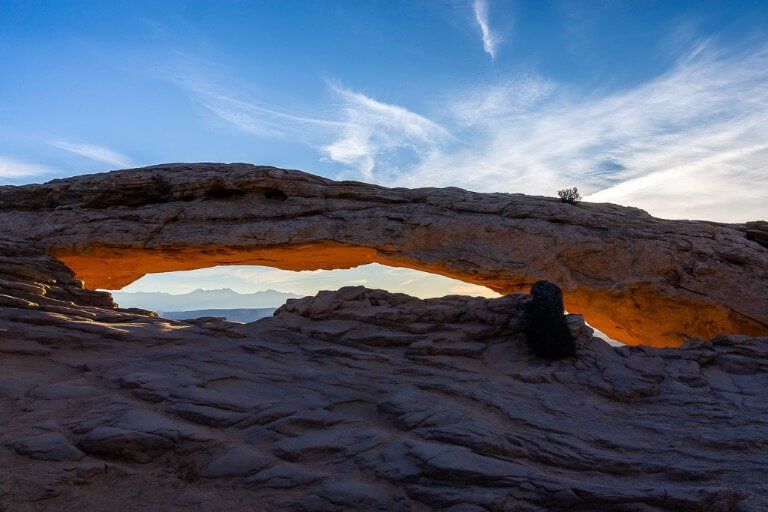
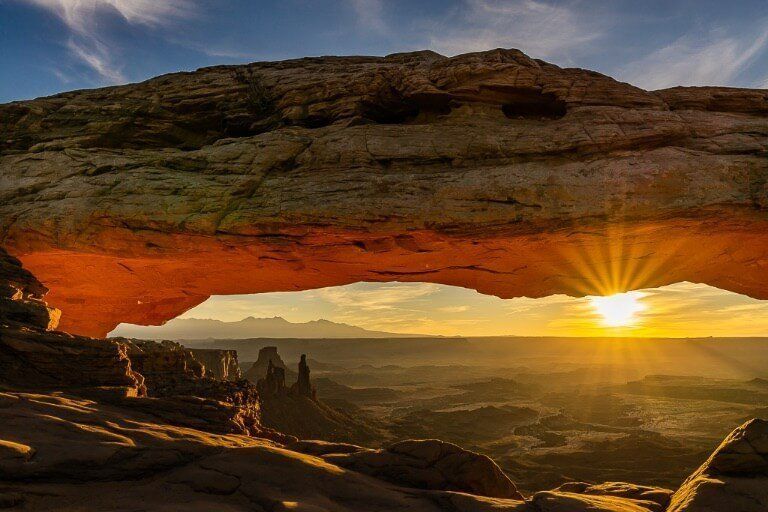
Now, the difference with Mesa Arch and what makes it so unique, is its backdrop. There’s no other arch with a 1,200 ft drop directly behind, opening up into a vast and dramatic canyon valley.
Looking through the Mesa Arch keyhole, you will marvel at Buck Canyon, White Rim Country and the La Sal Mountains in the distance.
Finally, to put the cherry on top, the view through Mesa Arch is due East – roughly between 90 and 100 degrees as you look at a compass.
As the first yellow and orange rays of sunshine hit the sheer cliff edge behind, light bounces upwards and illuminates the underneath of Mesa Arch with a stunning red glow.
Plan your entire vacation to Utah with our comprehensive Utah road trip planning guide featuring all of the Utah Mighty 5 national parks and more stunning natural features in Northern Arizona.
Why Make The Effort To See Mesa Arch At Sunrise?
Let’s face it, you will have to make an extraordinary amount of effort to see this sunrise at Mesa Arch. But we promise it will up there with the best you’ve ever seen and photographed.
We can count on two hands the amount of times either of us have been stunned in the true sense of the word, after years of travel. Canyonlands’ Mesa Arch at sunrise was one of those moments, this really is one of the most amazing things to do do in Utah.
Also, you don’t have to be a professional photographer to enjoy this unique spectacle. In fact, we met a ton of awesome people who just loved nature and couldn’t miss a thrilling sunrise on their visit to Utah.
Preparation The Night Before
Here are a few things you should do before going to bed the night before:
- Remember it will still be dark in the morning so don’t forget your powerful head torch and hand torch. Change the batteries the night before to eliminate any trivial problems causing any unneeded dramas when you’re tired in the morning.
- Charge your camera batteries and transfer SIM card data onto your hard drive. Don’t forget your spare batteries and SIM cards just in case – especially if it’s cold.
- Research images, blogs and forums to see which position you want to take up. Unfortunately for beginners and those with cheaper cameras / lenses (we were in this category!), your equipment matters at Mesa Arch. We will explain more on this in the photography tips section.
- Check weather reports and dress appropriately. Take extra layers for the morning if you are visiting outside of Summer. We visited on Mark’s birthday in mid November and trust us, you need layers at that time of year.
- Pack water and plenty of snacks at a minimum, but try to get hold of coffee if possible. You’ll need it at that time of morning especially if it’s cold out.
- Clean your camera lenses and make sure your tripod is functioning solidly. Little things like this can save you a lot of hassle in the morning.
What Time Should You Arrive For Sunrise At Mesa Arch?
The worst thing you can do is make the effort to get up early, drive all the way there and realize you’re far too late, the sun is already up and people are leaving the location as you arrive!
So, let’s get it right. Check sunrise times for Canyonlands the night before. Sunrise refers to full daylight, which means the sun is risen and you will have missed the best part of sunrise at Mesa Arch.
Look again and locate ‘Civil Twilight’, you will find a range of times early and late in the day. They are Civil Dawn and Civil Dusk. Find the Civil Dawn time range for the day you plan to visit.
Civil Dawn refers to the sun being 6 degrees below the horizon but at that time there’s a dim light in the sky, so you will need to arrive 30 minutes before the beginning of civil dawn. This is not for photography purposes now, but because there will already be people in the best spots by this point.
Using the day of writing this article as an example, sunrise is 5.57am but civil dawn is 5.25am – 5.57am. Therefore, today we would plan to arrive at 4.55am.
That may sound extreme but we worked to this method ourselves and still one person beat us to the punch. It wasn’t long until the row was full and each new person thought they would be the first to arrive.
What Time Should You Leave Moab?
We’ll assume you are or will be based in Moab, Utah. Your journey time from Moab to Mesa Arch parking lot is roughly 45-50 minutes.
There will be nothing on the roads that early, except any other crazies like you going for sunrise photographs … but we hope you don’t see any of those otherwise you’re late!!
Once you arrive, don’t forget you will have to hike a short trail to the arch itself but it should only take around 7-10 minutes.
Allow yourself 5 minutes to identify the best spot for your preferred type of photography, plus you’ll need a few minutes to get set up with cameras, lenses, tripods etc. The important part is arriving before the masses.
Using the times above, you know to arrive at Mesa Arch by 4.55am. The drive will take 50 minutes and the hike 10 to play it safe on all accounts. Therefore, you need to be pulling out of your hotel parking lot at 3.55am.
Setting Up Your Photography Gear
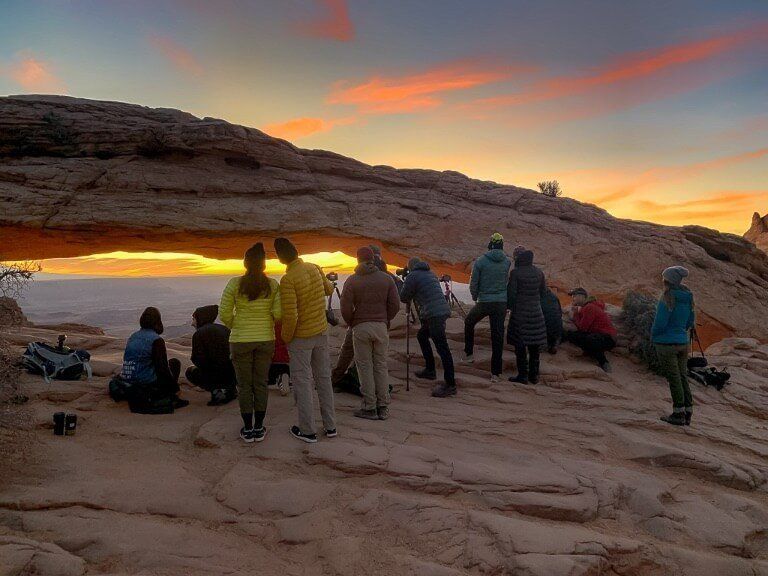
Unless the photography gods are shining brightly on you, there will be anywhere between 5-30 people vying for prime position at Mesa Arch. Here are a few tips for beginners to remember:
- If you arrive first (you should if you follow this guide!) don’t set up too far away from the arch. Once the pro’s arrive, they will want to be close to the arch and you might have to move up a little. Once you’re settled, you don’t want to be moving and it’s likely you won’t be able to anyway!
- Mesa Arch is smaller than it looks and the space where photographers anxiously decide on position is even smaller.
- Don’t worry if you aren’t the owner of a US$ 5000 camera sat atop a tripod looking like an AT-AT walker from Star Wars. You made the effort and you deserve to be up there as much as everyone else. You will just have to work harder to get top quality images.
- Make conversation with other photographers where appropriate. Some will want to focus but other will be grateful for the company.
- Ask for help from friendly photographers if you feel you need some. Gauge the general consensus about how the pro’s are setting up, taking their photographs and using their cameras.
- If you strike up a good relationship with another photographer, ask if they would like to switch positions for a few images to get a different perspective. They might not want to but it’s worth asking politely.
These reasons are why we suggest you spend 5 minutes the night before researching images, blogs and guides about sunrise at Mesa Arch. Use our images on this article to get a feel for optimal positioning.
Don’t Forget About Etiquette
One of the most eye opening parts of travel is seeing how devilishly some people can act when things don’t go their way.
The reason we used the term battle royale at the beginning of this article is because short of physically dueling, this photography arena can become slightly hot tempered.
More than a few of the later arrivals (who obviously hadn’t yet read this guide!) on our visit were audibly frustrated. A series of tuts, loud sighs, mutterings and eventually cameras being pushed through non-existent gaps between people occurred.
Look, it’s unfortunate that there’s only room for 20-25 maximum photographers but that’s why you have to arrive early. As they say, the early bird gets the worm. If you didn’t get up horribly early, you didn’t deserve one of the coveted spots.
It is important to remember etiquette, if the groaners had instead been polite and courteous, we would have asked if they wanted to jump in our spot for a few quick photographs.
It was busy enough the day we visited in mid November. Imagine what it would be like in July and August!
One last thing on etiquette; don’t try walking over the arch for an instagram photo. You are surrounded by people who have made a lot of effort to make memorable photographs. Best case you’ll piss everyone off. Worst case, you’ll fall off.
Mesa Arch Sunrise Photography Tips
Advanced Photographers
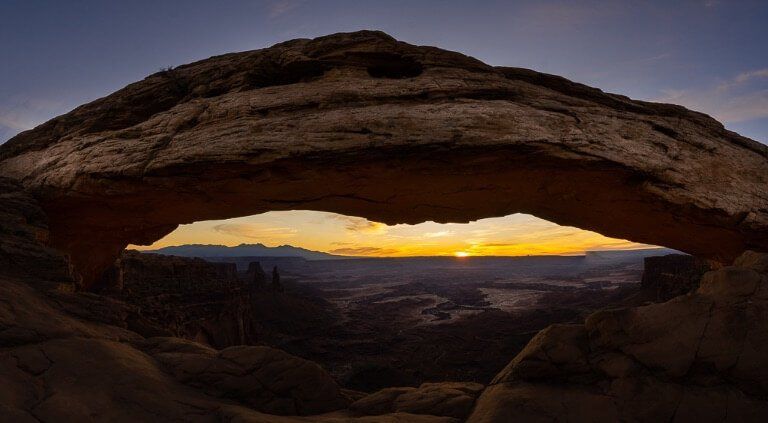
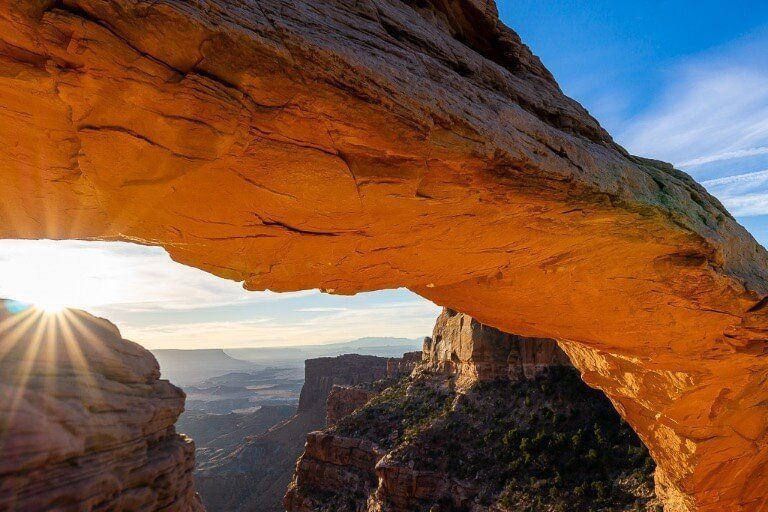
Take the widest angle lens you own. Ultra wide angle (10-24mm focal length) or even a fisheye lens (to get 180 degree images) will allow you to shoot the entire arch AND achieve sun flares in one shot with a narrow aperture such as f16 or f22.
You will need to set up to the right side of the arch as you look at it.
Beginner Photographers
It’s likely you won’t be able to get the entire arch and starburst of the sun in one image with your equipment. At the time, we only had a Sony a6000 (which we still love) with crop sensor factor x1.5 and a Sigma f1.4 16mm prime lens.
Therefore our widest shot was 24mm at f16, which allowed a nice sun flare but we knew we couldn’t get the whole arch in one.
Be aware of your foreground and background. Do you want images of Mesa Arch alone or with its jaw-dropping backdrop as a major part of your photograph?
Framing Mesa Arch Without A Wide Angle Lens
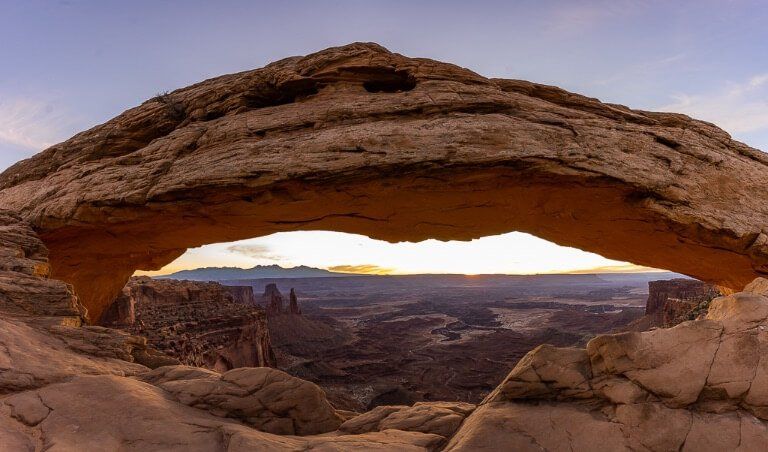
Arrive first and position your tripod slightly to the right of center as you look at the arch. You can take awesome photos of the arch with the sun to the right and canyon to the back left.
Do not set up to the left of the arch as you look at it because the canyon will be less dramatic in your background.
Set your tripod up robustly, choose ISO 100 for best quality (and least grain), narrow aperture (between f/11 – f/22 if possible) using AP – or aperture priority, and let the shutter speed set itself to allow enough light in.
Keeping your camera on the exact same horizontal axis (straight line) move your camera to the far left of the arch and take a photograph using 2 second timer for maximum stability (especially if SS is long).
Then move to center left, overlapping the edge of your fist photo. Continue to center right and finally far right of Mesa Arch – it should take 4 or at the most 5 images.
This technique is known as photo stitching.
Move smoothly along the X-axis and take care not to alter vertically. Keep settings the same throughout the process. If you feel like you’re not getting enough of the arch in vertically, do the same thing but this time take 8 photographs.
The first 4 along the bottom half from left to right and the second 4 along the upper half from left to right. Or turn your camera to a vertical position and move left to right.
Post Editing Mesa Arch Sunrise Images
When you get into Lightroom, select all 4 (or 8), right click, hover over Photo Merge and click Panorama. Select spherical (flatter) or cylindrical (rounded) and amount of boundary warp.
In addition to stitching, we used exposure bracketing which means shooting the exact same image at -1, 0 and +1 exposure. What we didn’t know at the time (we all have to learn!) was focus stacking.
We should have focused on foreground, middle and background separately at each exposure. Our backgrounds should be much more in focus. It’s a lot of work but it will greatly improve your end result.
Use Adobe Lightroom when it comes to editing your Mesa Arch sunrise photographs. How you edit will depend on your preferences. Everyone has their own creative way of editing a photograph to suit their style and brand.
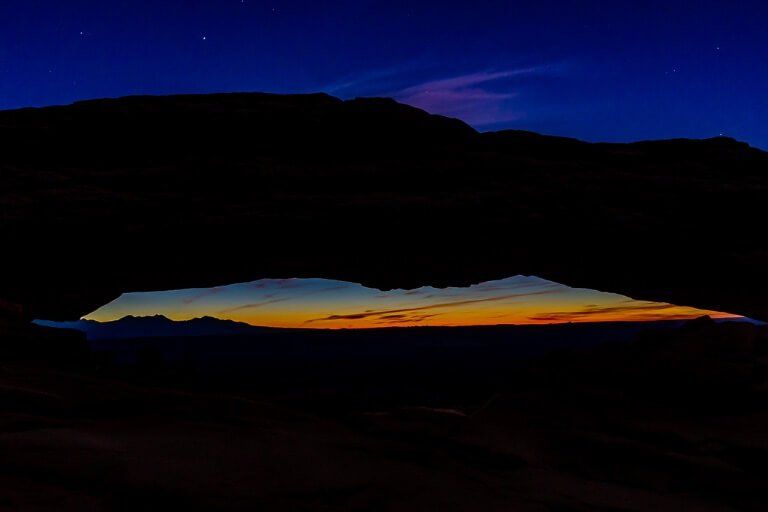
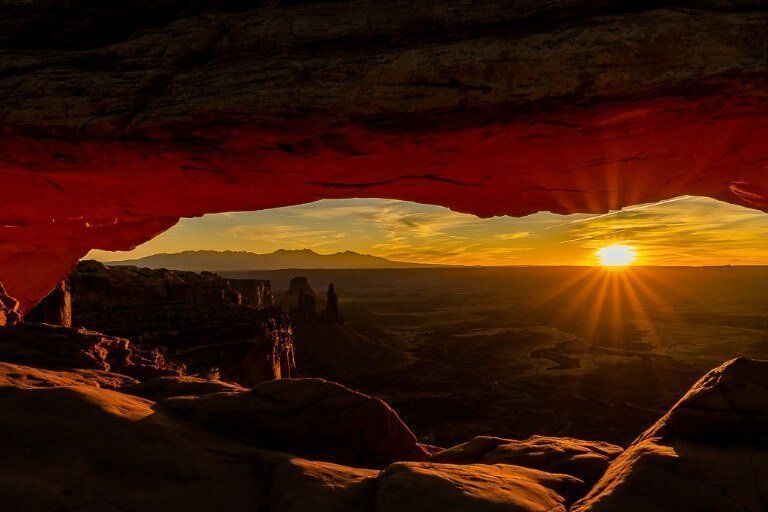
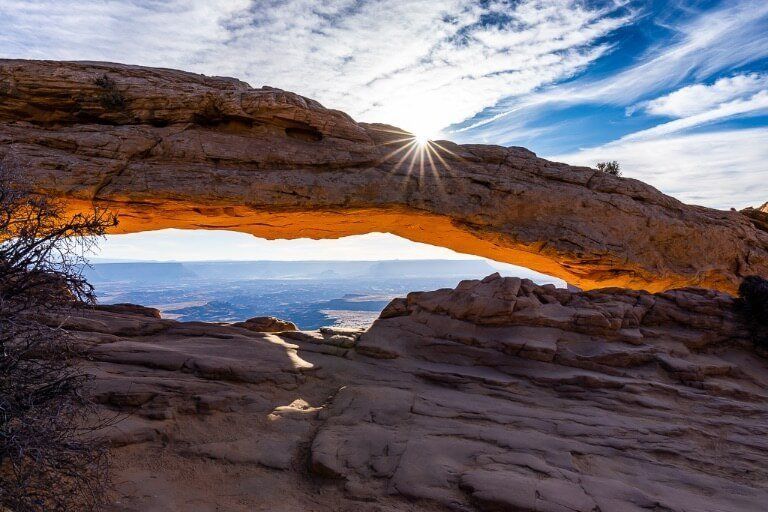
We’ve included various edits of Mesa Arch in this article to provide examples of what can be achieved in Lightroom. Personally, we prefer the darker sunrise edits over the canyon, with the foreground rocks slightly illuminated.
Remember that we used our entry level Sony a6000 crop sensor camera. Our image quality is not as high as a full frame camera with expensive lens. Our HDR panorama didn’t turn out as well as we’d hoped because the sky was cloudy and we didn’t focus on the background.
But there’s a lot you can do in Lightroom if you’re just starting out. Don’t forget to choose HDR panorama if you bracketed exposures.
Lightroom Settings
To give beginners an idea about how we edit the classic Mesa Arch photo, this is roughly how we adjust basic Lightroom settings:
- Level the horizon and crop any unwanted image area
- Remove chromatic aberrations and correct lens profile
- Adjust White Balance by sliding temperature and tint
- Decrease Highlights to around -70 to bring out the sky between arch and canyon
- Increase Shadows to around +40 to light up the arch
- Slide Contrast up to +20 to bring out the details, make the arch pop and add crispness
- Increase Clarity to +10 to add a little sharpness, particularly in the rocks
- Increase Dehaze slider to +10 to slightly remove haze from the distant background (or increase Dehaze to +70 to lose more haze – your colors will become too intense but you can counter that by reducing the vibrance slider and slightly increasing exposure to balance)
- If increasing Dehaze by only +10, next slide Vibrance up to +15 to pop the colors
- Use Adjustment Brush to paint over Mesa Arch, then increase exposure + 50 and clarity +30 to bring it to life
- Select another Adjustment Brush and paint over the canyon floor, increase exposure +30 and clarity +20 so the canyon looks detailed and bright
- If your photo needs sharpening increase that slider, but don’t forget to increase noise reduction to balance
- Make any final smaller adjustments where required
Make A Thousand Photographs
Okay we’re not suggesting you literally take 1,000 photos but it’s better to boot up Lightroom and discard 999 photos you don’t need, as opposed to realizing you have 0 quality photos, right?
“You don’t take a picture, you make a picture” is something we learned in Tony Northrup’s Stunning Digital Photography book and is something we keep reading whenever we want to learn more about a particular type of photography.
Utilize the spectacular background, clouds and sun flare at Mesa Arch to make amazing photographs you can be proud of. Use emotion and creativity to compose your frames and don’t forget you can look for inspiration from your fellow photographers.
Don’t Make The Common Mesa Arch Sunrise Mistake
In Summer you could find yourself among 30 other photographers desperate for the perfect photo of Mesa Arch at sunrise. We shared the arena with around 15 others in November when we visited.
However, something happened the day we were in Canyonlands that we couldn’t quite believe.
Let’s set the scene.
Drama and tensions were rising as we approached T-just a few minutes until the sun finally crept over the horizon through Mesa Arch. Photographers were still hurriedly arriving, huffing and puffing with exertion and realization they were late to the party.
Final checks on settings were being made and hushed small talk ebbed into silence. Light travels faster than sound but not at Mesa Arch!
The very instant we saw the first rays of sun, a cacophony of delighted gasps and an omnipresent clicking sound of shutters meant both senses of sight and sound were assaulted in synchrony.
However, not even 5 minutes had passed before the first photographer – who had woken up best part of 3 hours ago for this moment – packed up and left.
And like dominoes, they fell one by one until there were merely 3 cameras left. Wow!
Here’s the thing. You can still take fantastic photographs for a good 1.5-2 hours after sunrise. Particularly if you have an entry level camera.
You can take high quality images at ISO 100 without worrying about your camera not performing well in low light. And because everyone thins out, you can move freely around the battle ground!
Remember You Are In Canyonlands National Park
Canyonlands is split into two main regions – Island in the Sky and Needles. Mesa Arch is located in the Island in the Sky region.
Unless you’re really pushed for time or you plan to return to Island in the Sky over the next few days, now is your opportunity to explore half of a Utah Mighty 5 National Park.
You can see the best bits of this region in a few hours and even throw in a hike if you have the energy. Here’s where to spend the rest of your morning:
- Green River Overlook – Awesome panorama over the Colorado plateau
- Grand View Overlook – Another amazing viewpoint plus 2 mile roundtrip hike
- Upheaval Dome – Mysterious crater with an origin geologists can’t solve
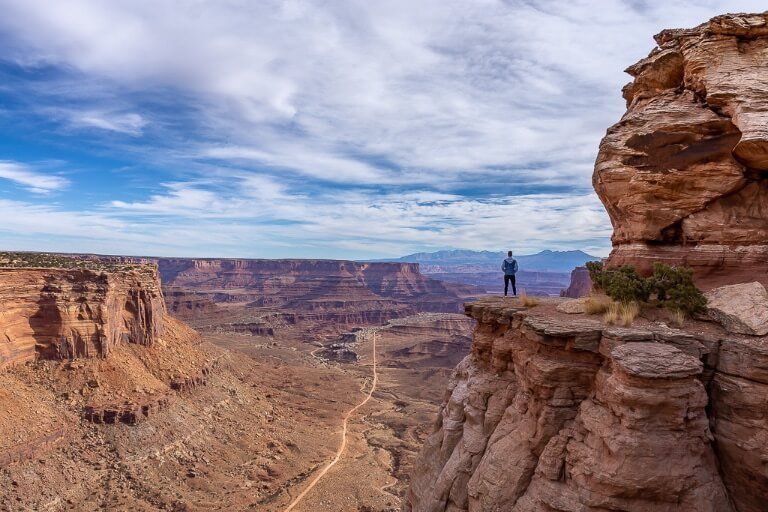
- Shafer Trail – 4WD / Motorbike trail back to Moab (looks frightening!)
Where To Eat And Stay In Moab, Utah
Moab is a lovely little town, packed full of hotels and restaurants.
Our top foodie recommendation is Thai Bella Moab – this place serves up incredibly delicious Thai food. Their spicy chicken peanut sauce is different level!
Be sure to compare hotel prices in the area before booking anything – see a full list of Moab hotels here.
When we visited Arches and Canyonlands, we stayed at Expedition Lodge, just over the road from Thai Bella in Moab.
The hotel was great, spacious room, 2 huge double beds and excellent breakfast. Also, there’s a hot tub and small pool with water slide if you’re traveling with kids.
Before searching for hotels, read our expert tips on how to always book the cheapest hotels when you travel.
Mesa Arch Sunrise Photography Interactive Map
Click into this map, zoom in / out and move around to orientate yourself with Moab and Canyonlands. It’s difficult to get lost but remember it will be dark when you leave Moab.
We’ve included a few of Canyonlands best stop offs incase you have some spare time after your shoot.
Read More About Arches and Canyonlands …
- Arches and Canyonlands: The Best Way to See the Highlights of Both Parks in One Epic Day
- Delicate Arch: Complete Photography Guide & Tips for an Unforgettable Sunset at Delicate Arch
- Hikes in Arches: The Ultimate Guide to Arches 3 Best Hikes – Windows, Devil’s Garden & Delicate Arch
More From Utah and Arizona …
- Bryce Canyon: The Best Photography Locations Plus Tips for Sunrise and Sunset
- Zion and Bryce: Epic 3 Day Road Trip Itinerary Hitting the Best Bits of Both Parks
- Grand Canyon Itinerary: The Perfect One Day South Rim Itinerary (Las Vegas Day Trip)
- Grand Canyon Viewpoints: Best Grand Canyon Viewpoints: 20 Amazing South Rim Views
- Sunrise/Sunset at Grand Canyon: 4 Most Amazing Sunrise and Sunset Photography Locations
We hope this helped with planning your Mesa Arch sunrise photography shoot!
For photographers of all levels in Moab checking out Arches and Canyonlands, our top two recommendations are Delicate Arch for sunset / astrophotography and Mesa Arch for sunrise photography.
Please let us know if you have any questions or need help planning for any of Utah’s Mighty 5.
Happy Snapping,
Mark and Kristen
Was This Post Helpful? Pin It For Your Mesa Arch Sunrise Shoot!

Note: This article contains affiliate links. When you make a purchase using one of these affiliate links, we may earn a small commission at no extra cost to you.
All Rights Reserved © Where Are Those Morgans, LLC. Republishing this article and/or any of its contents (text, photography, maps, graphics, etc.) in whole or in part is strictly prohibited.
Mark and Kristen Morgan are travel, hiking and photography experts. Over the last 6 years traveling full time, they have explored more than 40 countries and 30 US states.
Where Are Those Morgans has been featured in USA Today, Gestalten, Get Your Guide, CityPASS and Condé Nast Traveler along with various other publications. Read more about us.
Hi,
I was just wondering where that ledge photo is taken with what I think is Shafer Trail in the background, the person standing on the ledge looking onward…
I will be traveling out there soon and would like to do something similar
Thank you
Hi James, the photo was taken at Shafer Canyon Overlook. You can walk right out onto a narrow ledge for a fantastic view. Have a great trip!
Thank you so much! This post is supremely helpful. We’ll be visiting in a couple of weeks, so basically the same as your mid-November timeframe. Just curious though, were you there on a weekday or weekend?
Hey Paulo! Thank you for getting in touch and we’re glad this post was able to help you plan your visit to Mesa Arch. We visited on a Tuesday (19th November 2019) and were second to arrive, but it quickly filled up. You should be able to follow our timeline pretty closely for sunrise but definitely check the weather forecasts if you have a few days in Moab to pick the morning with the clearest outlook. If you need any more info please let us know, otherwise have a great trip and enjoy the amazing sunrise!
Oh it appears our timelines match up almost exactly lol. I was hoping for some good luck being a Tuesday/Wednesday/Thursday, but I guess there will be many people there regardless. Thanks again.
Yeah it’s a very popular photography location for pros and hobbyists but you might strike lucky on a quieter than usual day – especially this year with lockdowns. After you’re done at Mesa Arch, the sunset (and stargazing) at Delicate Arch over at Arches is awesome. Have a good one!
Amazing photo’s and dedication to get up for the sunrise, the results are well worth it.
Thank you Graham. Mesa Arch has to be one of the best sunrise locations we’ve been fortunate enough to see so far. It wasn’t easy getting up at 4am but it was worth the effort. We will go back and do it again with upgraded equipment to get even better photographs next time we’re in Utah.